I know, I know. I’ve been MIA for a (very) long time. Lots of life things have happened – some good, some not-so-good. And then I had this chance encounter with a lovely talented lady who is both a self-taught baker (like me) and a self-taught photographer (like me), and she’s a bajillion times more talented than I could ever dream of being. I told her I felt ‘insufficient’ in her presence, but that that’s a good thing – nothing inspires me to be and do better than feeling like I could be or do better. The last thing on my mind, though, was a DIY wall hanging, but little did I know how meeting this lovely person would spring it back into mind. Thank you, Claire Gunn – what a serendipitous collision of two souls! And seriously, check her out. Go. Now.
We met just yesterday on a food shoot for VILLA 47 and we got chatting about life, work and facing your fears. In not even close to six degrees of separation, we realised we have some very dear friends in common and that the chocolate sorbet she was photographing (and I was eating, coz let’s be serious…) was the same recipe she had passed onto the chef who passed it onto this chef when they worked together years before. MAD. Also chocolate sorbet…
In case you don’t know, which is highly unlikely considering her being kind of a big deal, Claire has made an incredibly successful career out of combining her talents, working hard to be authentic in her endeavors and taking no shit from nobody (‘Scuse the double negative…). I felt instantly inspired and that the rut I’d been in for a while had officially outstayed its welcome. So I’M BACK! I almost said ‘bitches’, but I won’t.

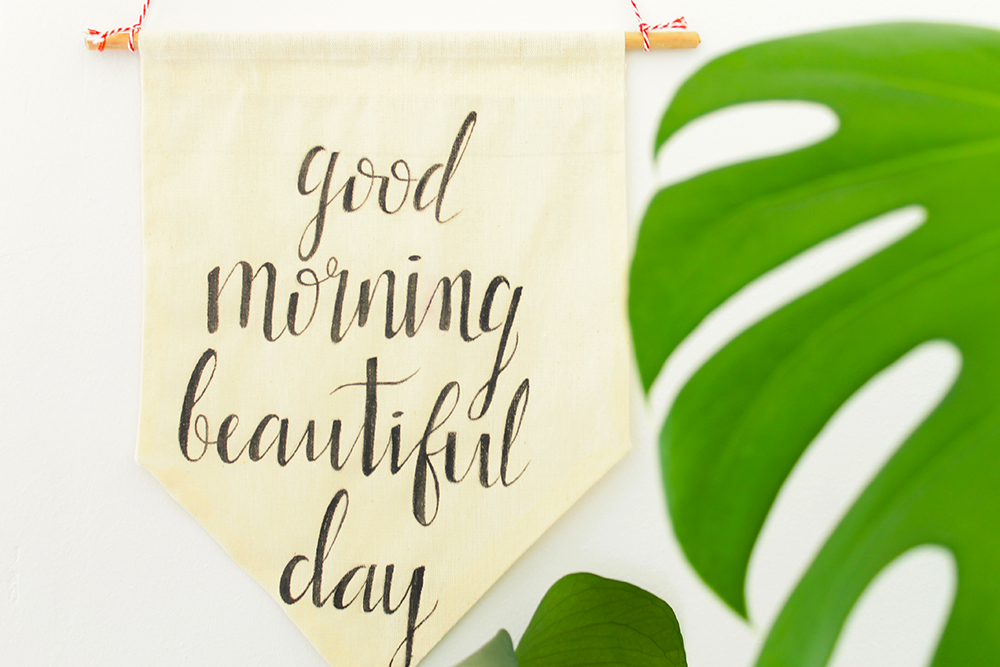
Then, after this lovely introduction to Claire, I was reminded of this old DIY I’d made a long, long time ago. Like more than a year ago! I made three of these cuties as part of my bridesmaids gifts on the night before my wedding to say thank you for just being the greatest humans alive. The words are inspired by one of my beautiful bridesmaids’ morning song that she’d always sing to me via WhatsApp voice note: “Good morning beautiful day, good morning beautiful day, good morning, good morning, good morning beautiful day.” Sounds simple, right? Coz it is. That’s what meeting Claire and remembering this little quote has thunderbolted into my brain. It’s simple to wake up and choose to be grateful for the beautiful day ahead. And focus on the good shit. And do what you love. And push yourself up and out of that rut. And get back to blogging. Coz that stuff isn’t tough, right? Asking for a friend… Jokes, that’s what this is – me getting out of that dirty little rut and back to doing what I love, no matter how tough it gets :)
Ok, so about this little DIY, I kind of made a mistake here… I cut my shape before drawing on the design and, you’ll notice, the design is a bit too big for the fabric. Do go ahead and draw your text first before cutting out the fabric, so you’re not a total noob like myself and you have a nice, evenly spaced design. If I only had to make one, I’d have started again, but I needed three for my three bridesmaids and I wanted them to be uniform, so… C’est la vie!
I hope you enjoy having a little pick-me-up hanging on your wall too :)

MATERIALS
raw, untreated canvas fabric
thin wooden dowel rods
scissors
dry ink pen
pencil
ink and paintbrush
craft glue
twine
INSTRUCTIONS:


01. On the fabric, draw the outline of your flag shape and the design in pencil BEFORE you cut it out for an evenly aligned design (unlike what I did, as mentioned above…). Make sure you’ve left enough space on the sides to fold and iron under for the seams. I also cut a slit into each corner and cut off a small triangle so it doesn’t bulge when it gets glued to the back. Also, can I just brag quickly about my Ralph Lauren pencil? *drool*

02. Go over your design’s outline again with dry ink pen. Wet ink will bleed into the canvas and ruin your design, so really only use dry ink! I do this step so I can easily flood the design with ink in the next step without any bleed.
03. With a steady hand and fine tipped paintbrush, trace and flood the design with ink. I’ve included a short video clip of me doing this – it really is so simple, so don’t be put off by hand painting! You can do it! Allow to dry thoroughly.

04. Sorry about the supremely blurry photo! Urghhh.. Anway.. When the ink is dry, fold the ironed seams back and glue into place. At the top fold a flap of fabric over the dowel rod and glue in place.
05. Tie a length of twine onto each end and that’s it! Hang this beauty where it can remind you everyday what a wonderful gift this life is and to never let yourself stew in a rut for far too long without focusing on what makes you happy!

Happy making!
♥ Dani
Such a wonderful blog. I just discovered it now & I’m delighted that I did. Thanx for the beautiful recipes & DIY’s. xxx
Thank you Yolandi :) Your blog is lovely too! xx
Pingback: Join us for the 30th Sweet Inspiration Link Party - A Crafty Mix
Pingback: Sweet Inspiration Link Party #30 - Repurposing Junkie
Hi Dani! Welcome back to the DIY world, your wall hanging is beautiful! I wish my attempts to hand lettering looked as nice as yours, you’re talented! The quote is just perfect, every day is a new gift
Hi Pili, thank you so much! The hiatus is finally over and it’s good to be back :) Try the hand lettering – it’s not as difficult as it looks, I promise. And yes, everyday really is a brand new gift. I hope you’re enjoying yours X
This is such a beautiful wall hanging!! Your bridesmaids are going to love these!!!
They did Keri! Thank you :) I think it was even more meaningful because of they’re the lyrics to the song my bridesmaid sings :) X
Dani, I love that wall hanging you made, it’s simple and it’s beautiful! I actually have some wooden sticks that I didn’t know what to do with! I might copy you here, ok?? Love this idea and a lovely quote on a wall is always a good thing!
But of course, Katrin! Put those wooden dowels to good use! And do show me how it turns out X
Hi Dani, that is such a beautiful wall hanging and a perfect way to start the day! I love the simplicity of it and it is very versatile and can be placed anywhere. I am glad to hear that you have overcome your rut. I have found that when I get in a rut I just push forward. I have a schedule that I stay on no matter what. And guess what? I actually manage to come up with ideas even if I’m in a rut. Sometimes we just have to barrel thru. Another option is to hang out in blog land all day. Haha! That will get the cobwebs out of your brain. There is so much talent out there and I believe you are one of those.
You know what, Mary, you’re 100% right – You really do just have to be strong and power through those horrible days with no creativity. Also, hanging out in blog land is the best land ;) And thank you, I think you too are one the talents out there X
Oh yay, yay, yay. I’m doing the happy dance right now Dani, I’m so glad you joined us at the party!!! Let me just finish the dance quickly so I can comment on the beautiful gift you made for your bridesmaids.
.
.
.
Okay, I’m done now ;-) The DIY wall hanging is so thoughtful and thanks for the great tip about using a dry ink pen to prevent bleeding. That’s genius. I’m so glad your getting out of that dirty little non-creative rut. We need to do what we love more often <3
Thank you so much Michelle! I think your happy dance is contagious :) Can’t believe it took me so long to get involved in your link party! Also, can I just say, your comments always make me feel so special and encouraged – thank you thank you thank you xx