
So I’ve just completed a mass order of 42 personalised mugs. FOURTY TWO. Needless to say there was much binge watching of pretty shocking TV, but this was a fun project and without this simple method of transferring my customised images, I would’ve been done for. DEAD.
There are quite a few methods out there for the Sharpie-mug-craze, but I think this one is the easiest and most fool-proof way of getting your image onto glazed ceramic, or any ceramic for that matter, without error and without your hard work washing or rubbing off.
Here’s what you’ll need:
HOW TO TRANSFER ONTO CERAMIC
MATERIALS
A ceramic mug
Porcelain paint pen (or an oil-based Sharpie)
Black marker
Paper
Tape
Pencil
METHOD
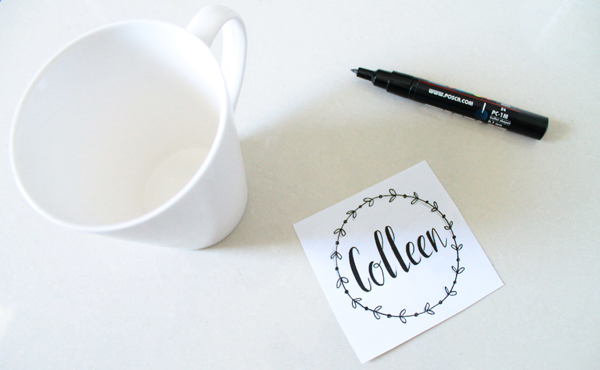
01. Draw your design onto paper. I did this first in pencil and then went over it in black marker. Alternatively you could print your design with a laser printer, but it has to be laser or the ink won’t transfer properly. I preferred to free-hand for this job, since I couldn’t find a handwritten font I liked and I wanted each person’s name to look unique. But you do you boo! :)

02. Cut out your design to fit the mug, and tape it down design facing down onto a flat surface (that you don’t mind scuffing) to keep it in place. Now you need to think of all the mean things anyone has ever said to you in your entire life and take it out on this design! Using your pencil (I find a softer graphite works well), draw over the back of your design REALLY HARD without ripping the paper. Seriously – go nuts. This, of course, was natural for me since I used to write just like this in Grade 1, much to the amusement of literally everyone except me. Childhood – good times. I do recommend going over the back a few times, getting as much of the carbon onto the paper as possible, just in case you miss any spots from the front.
03. Remove the design from the flat surface and tape in place on the mug, design facing forward and the pencil marking against the ceramic. Now go over the design again with the pencil to transfer the ink via the pencil marking on the reverse of the design. Like magic, but science!

04. Carefully remove the paper and you should have a faint but clear enough transfer of your design (YAY!). Now go over this design with your porcelain paint pen or oil-based Sharpie (water-based ones will wash away) until you’ve covered the transfer and you’re happy with your hard work! I was using gold so I needed to go over some thinner areas a couple of times. Use some acetone to fix up any mistakes if needed.

05. Depending on the porcelain paint pen’s manufacturer’s recommendations, bake in the oven at medium temperature (mine was 140ºC) for about 45mins. You designs will be sealed, scratch resistant and gorgeous, if I do say so myself :)
These make pretty easy gifts and are a great way to show someone you love them! Just be sure to tell your recipient not to dishwash them too often. Since they’re not glazed (which you could do if you have access to a kiln), the design won’t survive after too many rounds in the dishwasher. Rather give them a gentle handwashing and they’ll be good to go! Happy DIY-ing!


…FOURTY TWO…
♥ Dani
After applying the design to the mug, what is the suggested oven temperature and duration for baking to seal the design? Visit us Teknik Telekomunikasi
Pingback: Easy and Heartwarming DIY Christmas Gift for Mom » I'm Busy Shopping
Pingback: Emergency Valentine’s Day gift & date ideas – Beaverton Hummer
Pingback: 10 DIY Personalised Gifts You Can Make From Your Upcycled Stuff!
Pingback: DIY Coffee Mugs for the Perfect Early Morning Sip! - Diy Crafts Projects 2020 |Track Zik
Pingback: 10 DIY Personalised Gifts You Can Make From Your Upcycled Stuff!
I’m interested in doing this on black mugs; are the instructions different?
good morning: I do have a question…is there something to put over the picture afterwards that would make it dishwasher safe? Or is it in the type of markers you use that make it safe?
Hi there, but how do you remove the ecess pencil marks on the mugs?
What type of paper is used.
Pingback: Awesome Mugs to Make for Gifts - Busy Being Jennifer
So beautiful! Since you used metallic ink, do you think it’s microwaveable? I’ve bought mugs with metallic ink before and it specifically said NOT to microwave (might “explode”).
I love your DIY project! Very pretty! ? I am going to try this and see what I come up with! Thank you for sharing this!
Pingback: Awesome DIY Projects with Image Transfers - Listing More
Where do you buy your mugs? TIA
Hi Tere, I’m not sure where you are from but in South Africa I got mine wholesale from Makro. They weren’t very expensive at all when you buy in bulk.
Hi
These are beautiful – are you using POSCA pens and does this have to be on glazed items first then reglazed????
I have tried on pottery then glazed and all the colour came out!
Help mush appreciated! Thank you!!!
Beth
Hi Beth, I don’t know how I missed your comment! My apologies – yes these are POSCA pens, my favourite. It’s recommended that you do work on pre-glazed items for a better outcome. And once you bake them you don’t have to reglaze at all. The heat seals it on (though you’ll still need to be gentle with handwashing). Pottery is very porous and can only be worked on with potter’s glaze / paint. If you’ve made some pottery and then glazed it, you can always add to your finished product with a POSCA pen afterwards. Hope that helps? – Dani
Pingback: EMERGENCY Valentine’s Day gift & date ideas – Beaverton Hummer
Pingback: EMERGENCY Valentine’s Day gift and date ideas for the procrastinators, the forgetful, and the utterly clueless – Beaverton Hummer
Why would you need to use a laser printer when your tracing the design on by using the pencil method? Just curious why it matters? I have a design I want to print and just want to be sure. TIA!
Hi Leah, I’m no expert here but I think the popular opinion is that laser ink transfers more carbon onto the new surface than a regular inkjet printer. If you don’t have a laser printer, like me, and can do it by hand with a marker, it is a bit more work, but it’s an even better way to go in my opinion :) Good luck and let me know how it goes! X
I’m about to embark on my sharpie mugs too but I’ve read a lot of conflicting articles on the temp and time for baking is higher better or lower and longer?
Yay Bobbie, that’s awesome! THere a few methods out there, but I found going for lower temperatures for a longer period works better. Higher temps can alter the colour of the ink, making them come out quite dark (and ‘cooked’ I suppose). Slow and steady wins the race ;)
If you tape the design on the mug doesn’t it make the words turn out backwards? Is there a secret to getting the words so they come out right?
I just realized my mistake. Thank you for your instructions.
Hi Deb, yes Sydney is right – the design is the other way around, but I know it can get confusing! Hope yours turn out lovely :) x
It won’t come out backwards bc when you tape it on you are taping the printed side face up.
I’m so glad I revisited this! That is what I thought but I was also confused, thanks for re-editing! I’m going to try and make some fancy Tea Rex mugs for christmas!
Oh yay Kaylie I’m so glad! THese do make for wonderful Xmas gifts – and they’re cheap and easy to do! Hope yours turn out lovely xx
Wow, beautiful website. Thnx ..
Thank you! :) x
Do you tape the design on with the black/ink pressed onto the mug and then use pencil over the back? The photo order confused me a bit and I want to make sure I do it right!
Hi Cait, you’re absolutely right! Thank you for highlighting this – I’ll go in an edit the instruction now so it’s clearer. My mistake – I really appreciate you letting me know! And do let me know how yours turn out :) – Dani x
Great! Coincidentally, I too binge-watch sh*tty shows while crafting!
Don’t we all, Nikki! Nothing better than a bit of mental switching-off while doing something fun – multitasking for the win! :) Also, don’t you just go out of your mind (like I do!) if your hands aren’t busy?! It’s like I can’t sit still unless I’m doing two things at once. Madness!
These are great.
What type of porcelain markers did you use? Is pebeo, sharpie or what?
Hey Safia, thank you so much! I’m so glad you like them :) These are Posca pens, but you can use Sharpies too. Just make sure you use oil-based ones (they usually have a different coloured lid) – water based ones will wash off unfortunately. If you make some, let me know! – Dani